System Audio Headphone EQ and Spectrum Analyzer for macOS
Vizzdom is a little tool for macOS that lets you see the frequency spectrum, RMS and peak level of your system audio. It includes a small driver that you can also use to record your system audio and a 10 band parametric EQ with AutoEq settings import for equing your headphones 🎧
- Batteries included: Comes with own loopback driver that is easy to (un)install
- Efficient: Native app that uses Apple AUNBandEq equalizer
- Fully parametric: 10 bands that are fully parametric - low shelf, hight shelf or parametric
- Volume Sync: Smooth on/off switching without volume jumps
- AutoEQ import: Tune your AutoEQ curve and import the settings easily
- Visualize: See the input frequencies and levels for all input channels
- Presets: Save your eq settings to switch easily
- Responsive: UI fully adapts to the window size
- Status bar item: Quick access menu and on/off light
Download
macOS (ver. 1.36)
If you like the app please consider supporting the development by buying me a coffee 🙏
Supported macOS versions
- All macOS versions down to 10.14 should work, on old versions some icons can be missing
- M1+ and Intel macs
Jump to the FAQ ⏭️
Changelog
1.36 (3/2026)
- Fix blurry grid on retina displays
- Drag & Drop for preset text files
1.35 (3/2026)
- Energy save can be disabled (Setup > Save Energy) to show the analyzer when running in the background
- Analyzer rendering is now 3-4x more efficient for the CPU and battery
- Level meter is smoother
- fix: app was randomly crashing when running the analyzer for a while
- updated the driver to conform better to core audio properties
1.34 (7/2025)
- Make preset import more flexible
- Bugfix for global gain in bypass
1.33 (7/2025)
- Add more sample rates for the included driver
1.32 (5/2025)
- Filtertypes are now selectable for each band
- Low and high shelf are fully parametric
- Fixed a bug with preset loading (duplicate preset names -> 💥)
- Bug fix: low and high shelf were accidentally set to parametric 😬
1.31 (4/2025)
- Added a status bar item with an on/off indicator and a menu with an entry to toggle
1.30 (4/2025)
- Save some CPU cycles by not analyzing the signal in background.
1.28 (7/2024)
Hopefullyfixed an issue where the audio would start to crackle after a while.
1.27 (6/2024)
- The automatic driver install had stopped working at some point, sorry - please reopen the app after installing the driver!
1.26 (6/2024)
- Calm down spectrum view a little bit
1.25 (5/2024)
- Fix a bug where the app would pick the mic input
1.24 (5/2024)
- Detect audio device changes automatically
- Fill the spectrum graph
- Energy save in background
1.21 (5/2024)
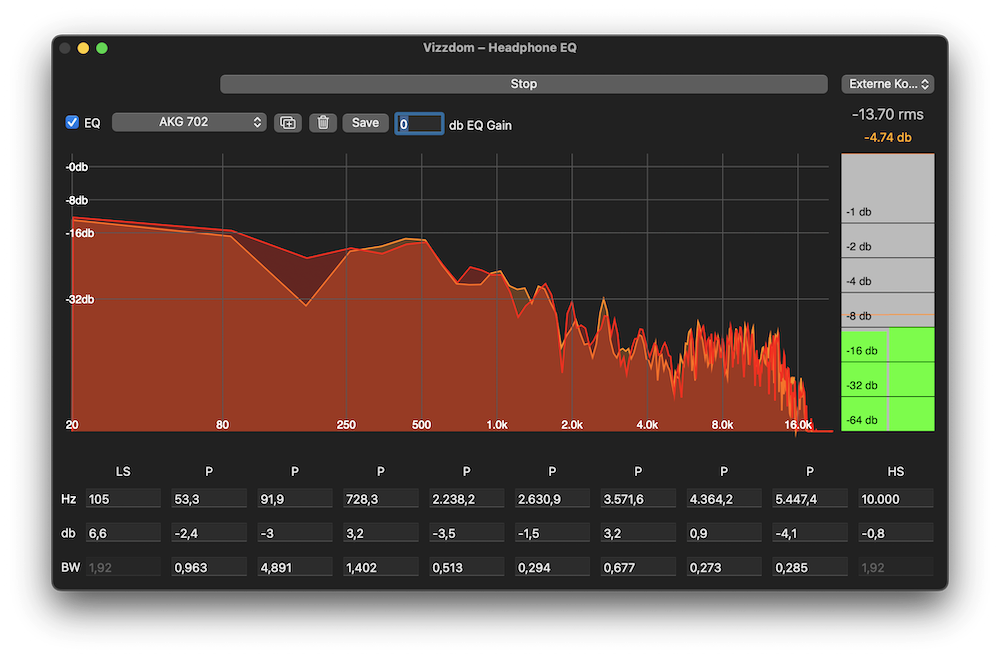
- Added a 10 Band EQ and AutoEq import
1.10 (5/2022)
- release signed by Apple
1.0 (8/2018)
- Initial release
Disclaimer
This is personal software - it works for me but your mileage may vary ✌️
FAQ
How to install
- Download and optionally move the app to your program folder - then open the app. If you like to use the analyzer or eq, you need to grant microphone access when asked
- You should see an “Install Driver” button - click to install the driver (/Library/Audio/Plug-Ins/HAL/DriveThrough.driver) and restart coreaudio
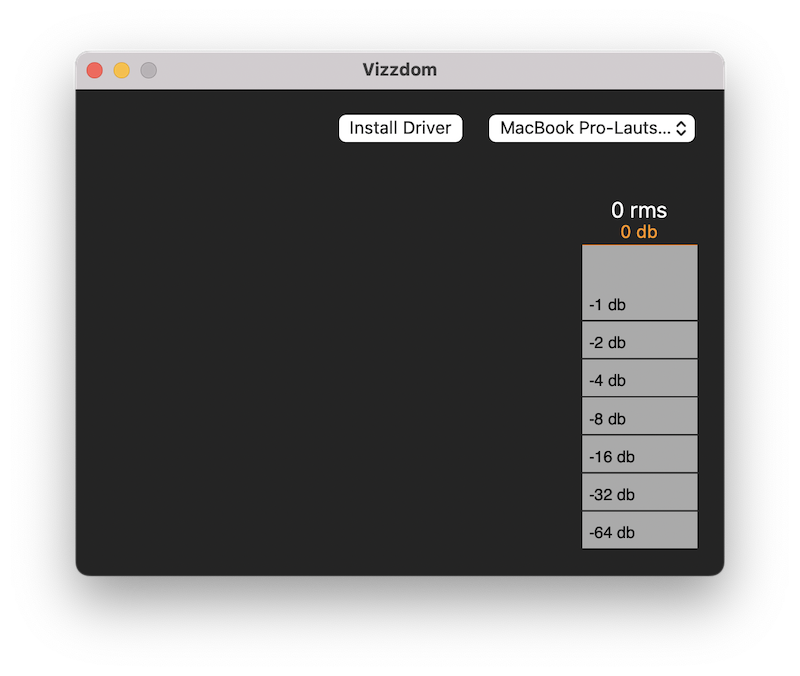
- After installing the driver, the app shuts down - please reopen the app and you should see a start button
- If you hit start, the app pipes your system audio through the virtual device and you should see the frequencies dance when playing audio 🕺 (not needed for recording)
How to create your own EQ preset
If you enter settings manually, for example from Oratory1990, just make sure that you use the BW values, not the Q values. If there are no BW values you can use a calculator to convert the values.
- Enter your EQ settings
- Hit the plus icon next to the preset list
- Name your preset
If you make further adjustments, don’t forget to hit save. You can also make adjustments and make a new preset from it - just hit the plus button after adjusting.
To delete a preset just hit the trash can when the preset is selected.
How to use AutoEq settings
AutoEq is an algorithmically created collection of eq settings for a lot of common headphones to fix some flaws in their frequency response.
- To use a setting, enter your headphone on the AutoEq website and adjust the profile to your liking. Then select “soundsource” as equalizer app and hit the download arrow. Open the file in a text editor and copy the content.*
- In the app click the icon with the plus next to the preset list. Give the preset a name, paste your AutoEq settings and hit ok!
* You can also use “AUNBandEq” as app and copy the values manually - that is the equalizer that lives under the hood!
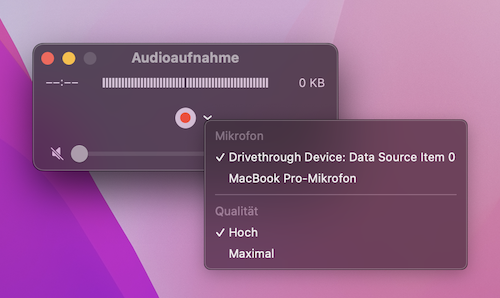
How to record system audio
Anything that is playing through your speakers or headphones can be recorded after installing the driver.
- First if you have not done already follow the steps to install the driver
- To record audio, you go to your audio settings and choose “Drivethrough Device” as Output
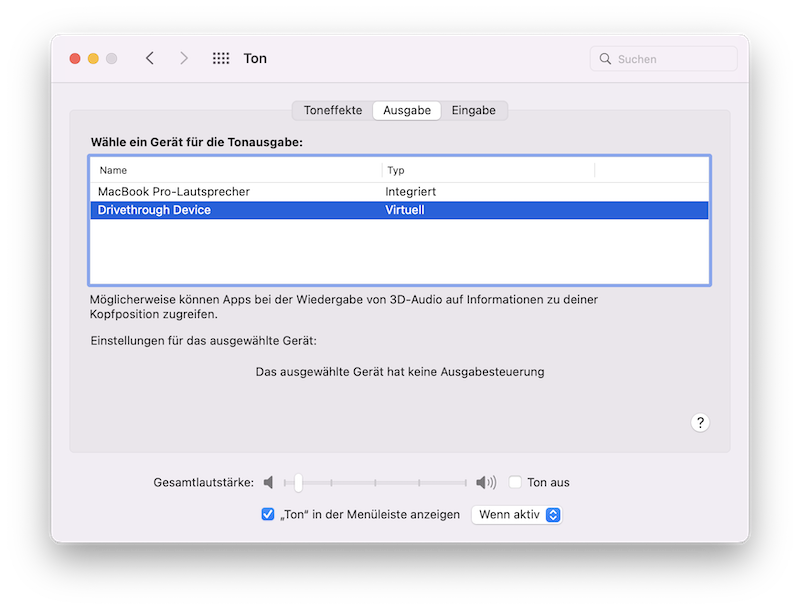
- Then you can use this device as Input in other apps like Reaper, Ableton, Cubase, Garageband, Logic, QuickTime, Maschine etc. to record or sample audio coming from anything your computer can play.
How to reset the peak level
Just click on it :)
I cannot hear audio anymore
Check if the output is set correctly in your system settings and that nothing is muted - sometimes things can get out of sync, but most of the time you only need to set the output and/or unmute/change volume.
How to uninstall
If you want to uninstall the driver, simply open the app and choose “Setup -> Uninstall Driver”! The app shuts down afterwards. After that just delete the app as you would normally do.
If you prefer to remove the driver manually just run this from your terminal:
rm -rf /Library/Audio/Plug-Ins/HAL/DriveThrough.driver

kill `ps -ax | grep 'coreaudiod' | grep 'sbin' |awk '{print $1}'`
Credits
- example code for a NullAudio driver that is helpful to create a minimal virtual audio device.
- CAPlayThrough, shows how to pipe audio from one audio device to another one connecting it with a varispeed node.